How to Resize Images for Instagram — Square, Portrait & Story Sizes
Quick Answer: What Size Should Instagram Photos Be?
Instagram displays every photo at a maximum width of 1080px and re-compresses everything you upload. Resizing your photo to Instagram's exact display dimensions before uploading — instead of uploading full camera resolution — is the single best way to keep it sharp. Here's the short version:
TL;DR — Resize to Instagram's exact dimensions before uploading, never upload full camera resolution:
- Square post: 1080 × 1080px (1:1) — the safe default that looks right in feed, grid, and Explore.
- Portrait post: 1080 × 1350px (4:5) — takes more screen space and tends to get higher engagement; the tallest ratio allowed in the feed.
- Story / Reel: 1080 × 1920px (9:16) — full vertical screen; stories and reels share the same dimensions.
- Landscape post: 1080 × 566px (1.91:1) — horizontal photos; Instagram's algorithm de-prioritizes them.
- The 1080 rule: Instagram never displays wider than 1080px — anything larger is downscaled (not always cleanly) and re-compressed, which costs you sharpness instead of gaining it.
Why Getting Instagram Sizes Right Matters
Instagram processes millions of uploads daily — and it applies its own compression and resizing to every single one. If you upload a full-resolution 4000px photo from your camera, Instagram will downscale and recompress it, often introducing visible artifacts. The best defense: resize to Instagram's exact display dimensions before uploading, so Instagram only compresses once — not twice.
Properly sized images also upload faster, take less storage on your phone, and look sharper in the feed. Here's exactly what sizes you need and how to get them.
Instagram Image Sizes — Complete Guide for 2026
| Format | Dimensions | Aspect Ratio | Notes |
|---|---|---|---|
| Square Post | 1080 × 1080 px | 1:1 | The classic Instagram format. Most forgiving — works well in both feed and grid preview. |
| Portrait Post | 1080 × 1350 px | 4:5 | Tallest allowed in feed. Takes more screen space → higher engagement. Max vertical ratio. |
| Landscape Post | 1080 × 566 px | 1.91:1 | Horizontal photos. Less common — Instagram de-prioritizes landscape in the algorithm. |
| Story / Reel | 1080 × 1920 px | 9:16 | Full vertical screen. Stories disappear in 24h; reels live permanently. Same dimensions. |
Key rule: Instagram always displays at 1080px wide maximum. Uploading larger than 1080px wide is wasted — Instagram will downscale it, and its downscaling isn't always clean. Always start at 1080px wide.
How to Resize Images for Instagram
For square, portrait, and story posts, the fastest way is our one-step Instagram Post tool. Pick a format, upload your photo, and it auto-crops to the right ratio and compresses under 1MB.
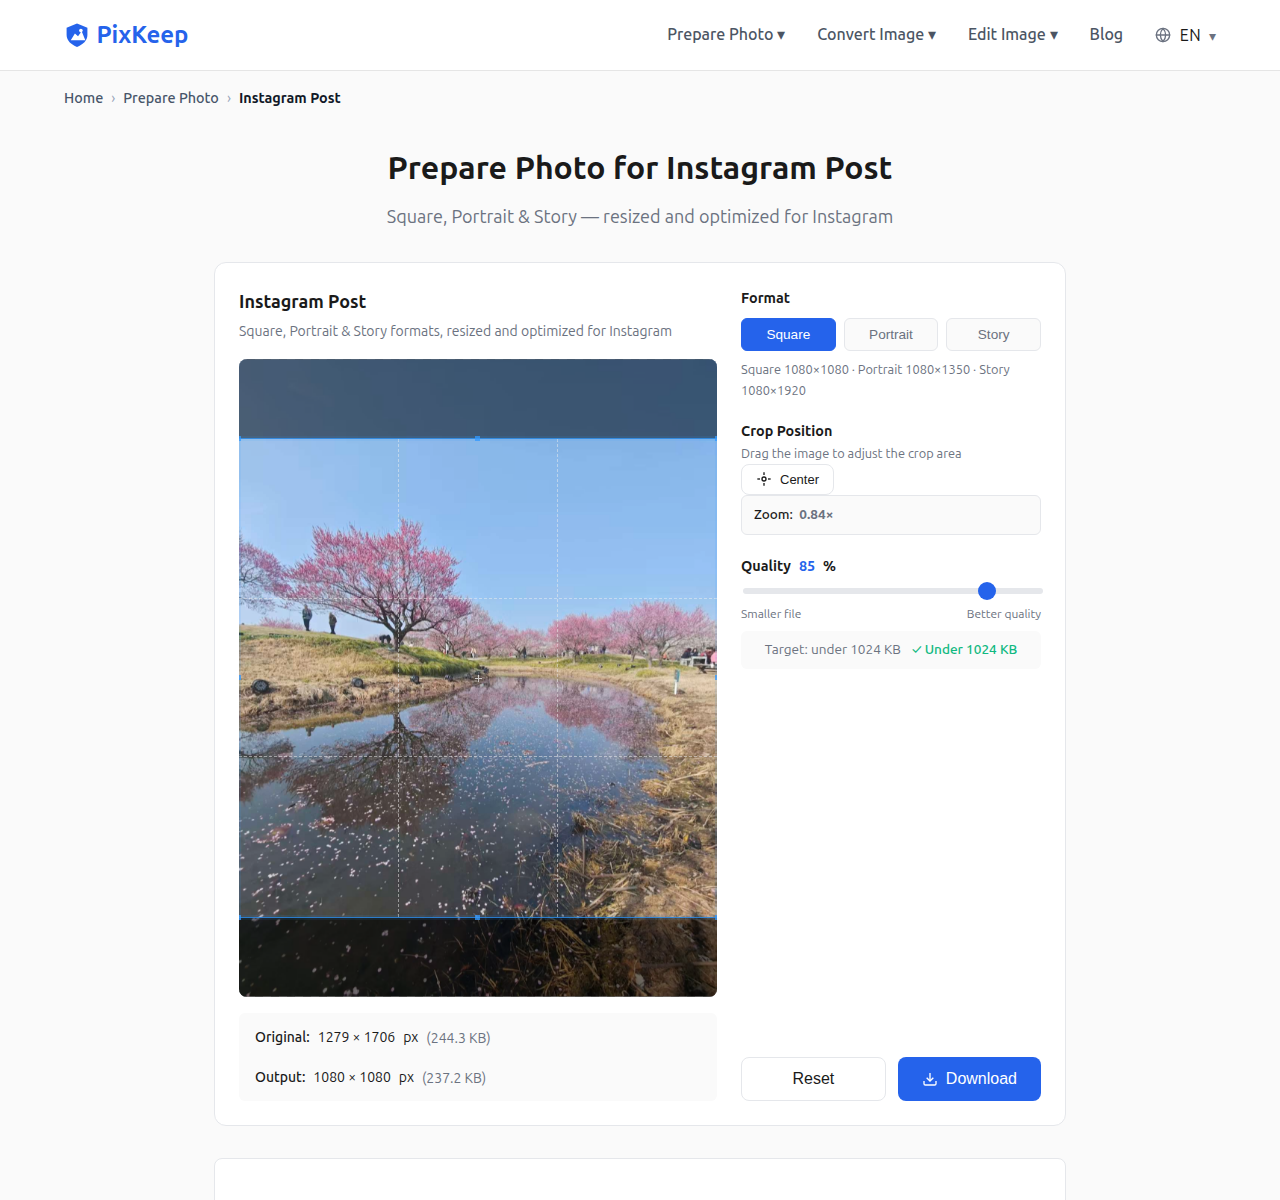
Drag to adjust the crop position or tweak the quality slider, then save it. Prefer manual control? Here's the same result in three steps — crop, resize, then upload:
Step 1: Crop — Trim What You Don't Need
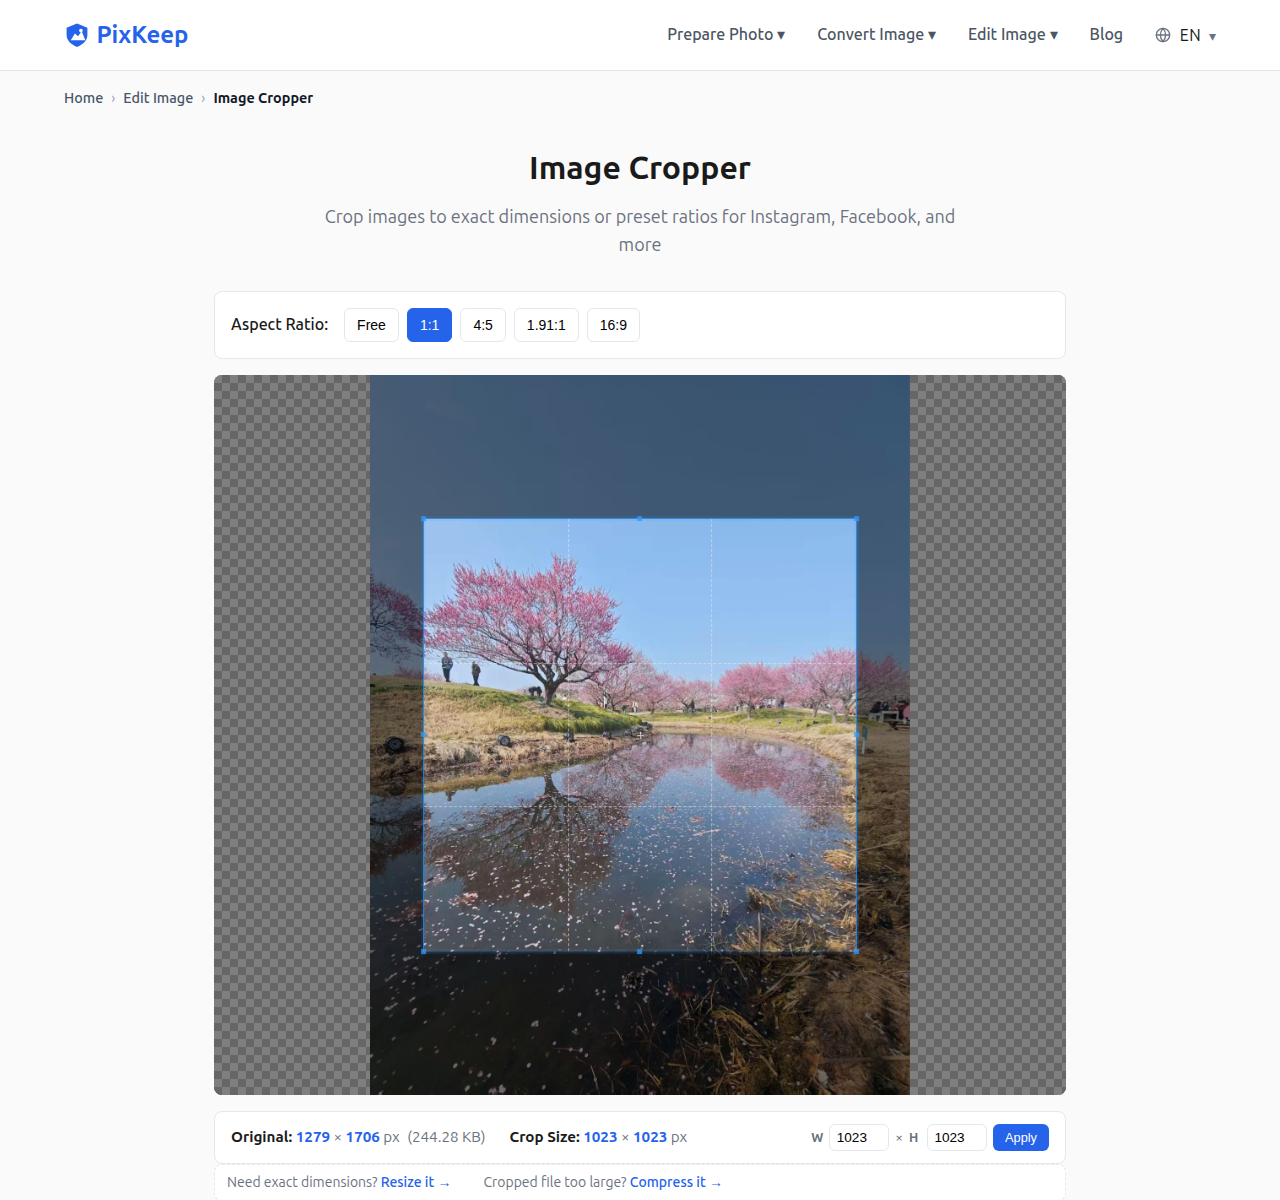
Open the Image Cropper and upload your photo. Drag the frame to keep only what matters — use a preset ratio (1:1, 4:5, 9:16) or freeform — then hit Crop & Save. From there, the Resize it → link sends your trimmed photo straight to the resizer.
Step 2: Resize — Set Exact Dimensions
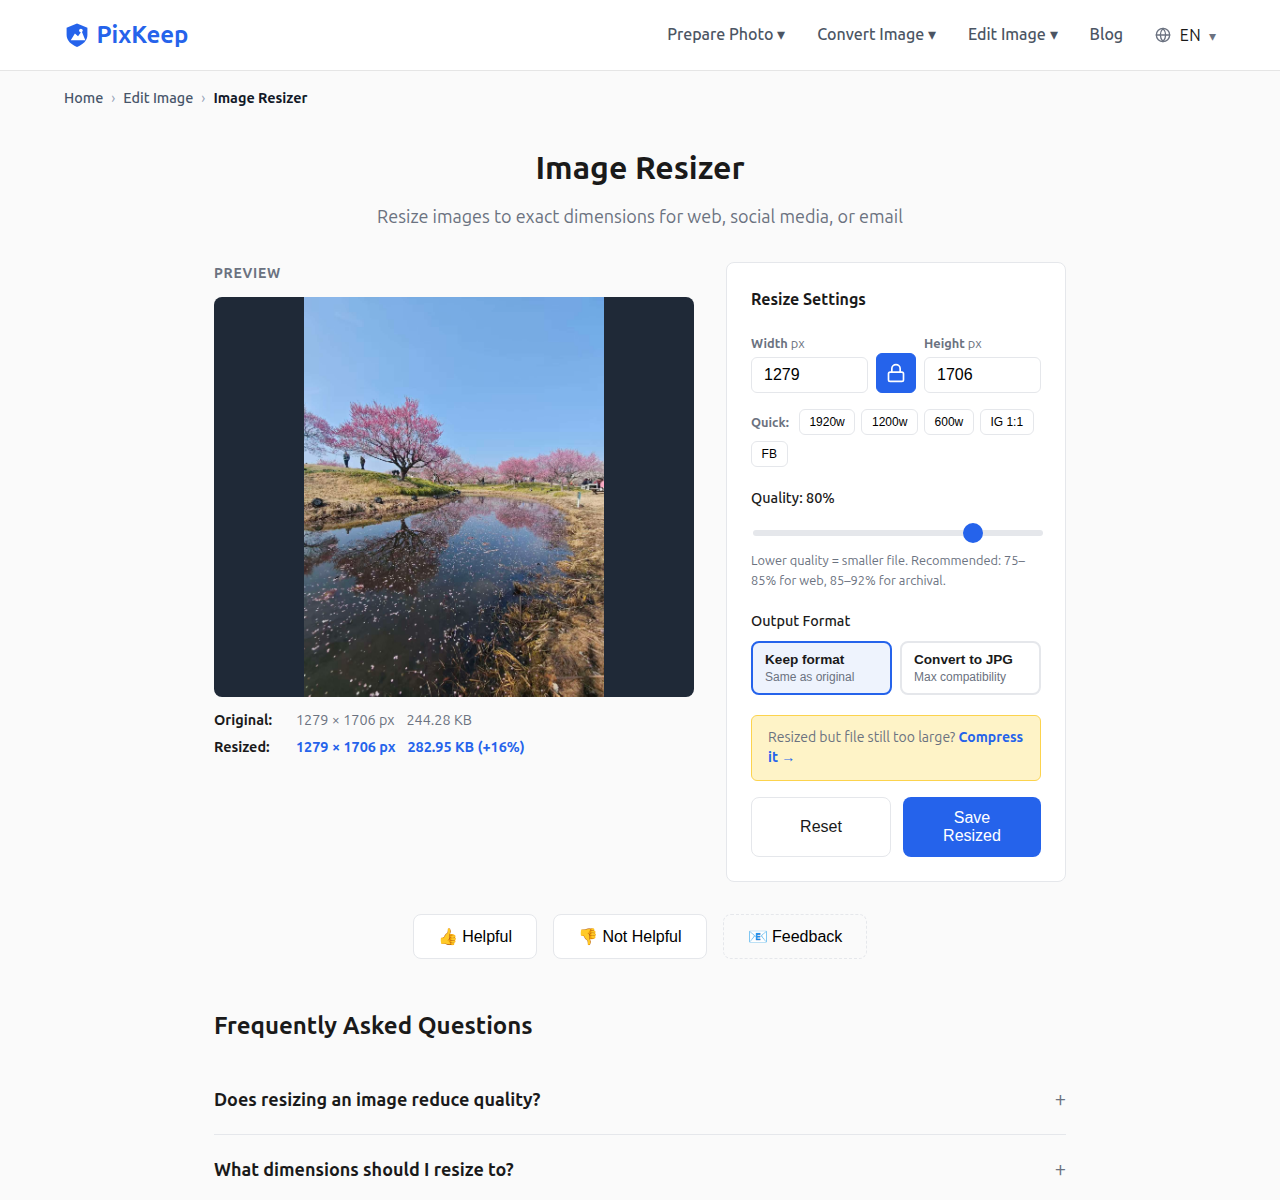
In the Image Resizer, enter the exact size for your Instagram format:
- Square post: 1080 × 1080
- Portrait post: 1080 × 1350
- Story or reel: 1080 × 1920
Keep JPG at 85% quality for photos (PNG for graphics with text), then hit Save Resized. The resizer accepts JPG, PNG, and WebP — for iPhone HEIC photos, convert with our HEIC to JPG converter first.
Step 3: Upload to Instagram
Open the Instagram app, start a new post, and choose the photo you just saved. It's already at Instagram's exact display size, so the single recompression Instagram applies won't visibly degrade it.
Square vs Portrait vs Story — Which Should You Use?
Square (1:1) — The Safe Default
Best for: general posts, photo dumps, product shots. Square is the only format that looks perfect everywhere — in the feed, in your profile grid, and in the Explore tab. If you're unsure, go square.
Portrait (4:5) — The Engagement Magnet
Best for: detailed shots, fashion, food, before/after comparisons. Portrait photos take up more vertical screen real estate, which means more time for the viewer to engage. Creators consistently report higher engagement on portrait posts vs square. The trade-off: your profile grid thumbnail crops to a square, so make sure the key subject is in the center area.
Story / Reel (9:16) — Full Screen Immersion
Best for: behind-the-scenes, tutorials, announcements. Stories and reels use the full phone screen, which is extremely immersive. But photos and graphics designed for feed don't automatically work here — you usually need to compose specifically for the 9:16 frame. Use our Image Cropper in freeform 9:16 mode to reframe existing photos for stories.
Common Instagram Sizing Mistakes
Uploading Full Camera Resolution
A 4000×3000px photo straight from your camera is 12MP — overkill for Instagram's 1080px display. Instagram will downsize it server-side, and you have no control over the resize algorithm they use. Always pre-size to 1080px wide before uploading.
Using the Wrong Aspect Ratio
Instagram crops anything outside the 4:5 to 1.91:1 range. If you upload a full 2:3 DSLR photo (typical portrait orientation), Instagram forces it to 4:5 — and the auto-crop might cut off the top of someone's head. Pre-crop to the right ratio using our Image Cropper to control exactly what stays in frame.
Uploading PNG for Photos
PNG photos can be 5-10× larger than JPG at the same resolution. Instagram will compress them regardless — and a 5MB PNG compressed by Instagram often looks worse than a well-compressed 500KB JPG. Save PNG for graphics with text and transparency.
Not Checking the Grid Preview
Your profile grid shows every post as a center-cropped square thumbnail. If your portrait photo has the subject at the very top or bottom, it may get cut off in grid view. Use our Cropper's 1:1 preset to preview how your photo will look in the grid before posting.
Frequently Asked Questions
What is the best size for Instagram photos?
1080×1080px (square) is the safest, most versatile size. It looks correct in every Instagram context — feed, profile grid, and Explore. If you only remember one number, remember 1080.
Does Instagram compress my photos?
Yes, Instagram applies compression to every upload. The best strategy is to pre-size your photo to exactly 1080px wide at 85% JPG quality — this gives Instagram a clean source that only needs one round of compression, rather than a high-resolution original that gets both resized and compressed.
How do I resize a photo for Instagram without losing quality?
Resize to exactly 1080px wide before uploading — never upload a full-resolution photo. Use a dedicated resizer rather than relying on Instagram's built-in resize. Start from the highest quality source available, and save at 85% JPG quality. For step-by-step instructions, follow the workflow in the section above.
Can I resize for Instagram on my phone?
Yes — our Image Resizer works on both iPhone and Android mobile browsers. Upload directly from your camera roll, set dimensions, and save. All processing happens on your device, so it works without an internet connection — resize your photos on the go, even without Wi-Fi or cellular data.